
Do you own a domain name that you’d like to use for e-mail? There are lots of options for using your own domain name for your e-mail address. For instance, you can use your hosting’s e-mail service. Or you can use Google Workspace with all the Google services like Gmail, Google Drive and more, using your own domain. But not many people know that you can also use your custom domain with Apple’s iCloud e-mail service.
Using a service like iCloud has many advantages. For instance, you’ll have peace of mind knowing your e-mails are being stored safely in the cloud. Also, iCloud Mail synchronises automatically between all your Apple devices like iPhone, iPad and Mac.
Tip:
Elegant Themes offers two amazing WordPress
themes (Divi en Extra) for just $89 per year
OR $249 for lifetime access!
To use your own domain name (like wouterpostma.com) for Apple’s e-mail service, you do need to have an iCloud+ subscription. This will set you back between $0.99 and $9.99, depending how much storage space you need (this price can differ per country).
Contents
How to use a custom domain for iCloud Mail
To use your own custom domain name for iCloud Mail, you’ll need to make sure that you have access to your domain name’s DNS settings. These need to be adjusted to point e-mail for your domain towards iCloud. In addition, as mentioned above, you’ll need at least an iCloud+ subscription. The free version of iCloud does not offer custom domains.
To set up your own domain with iCloud, follow the steps below.
1: Login to iCloud
First of all, log in to iCloud.com with your Apple ID. This is the same account you’re using to download apps on your iPhone.

Once you’re logged in, go to your Account Settings on the top right corner of your screen (in the drop down menu under your name):

2: Add a Custom Email Domain
In the Settings, search for the Custom Email Domain setting and click the Manage button:

Next, Apple wil ask if you want to configure a custom domain for yourself only, or if you’d like to also give your family members their own custom email address. In my case, my domain only applies to myself, so I select the Only You option. Then, fill in the domain name you’d like to use:

3: Add existing email addresses
Do you have an existing email address (or multiple) on your custom domain? You’ll need to enter those in step 2 of the iCloud configuraton:
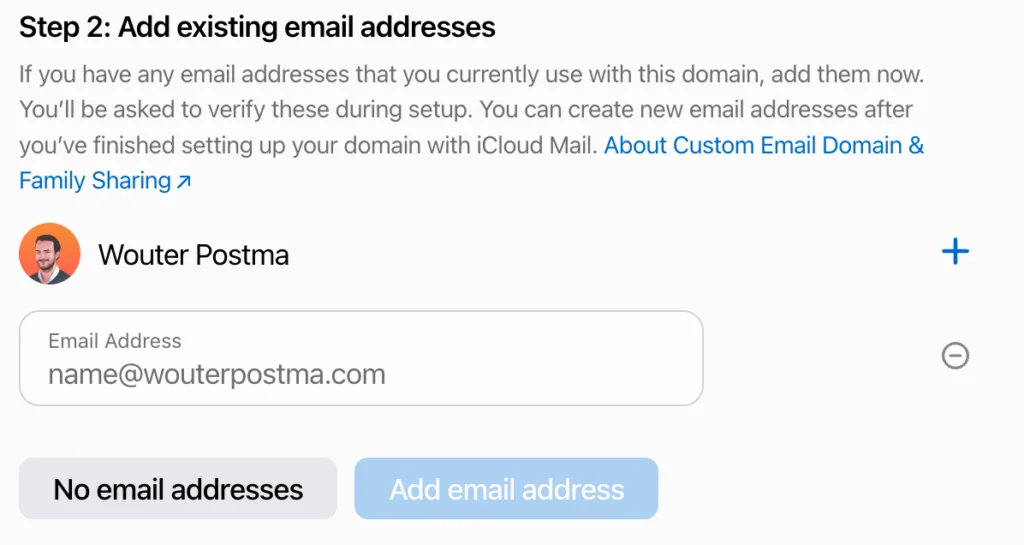
If you don’t (yet) have an email address running on this domain, click No email addresses.
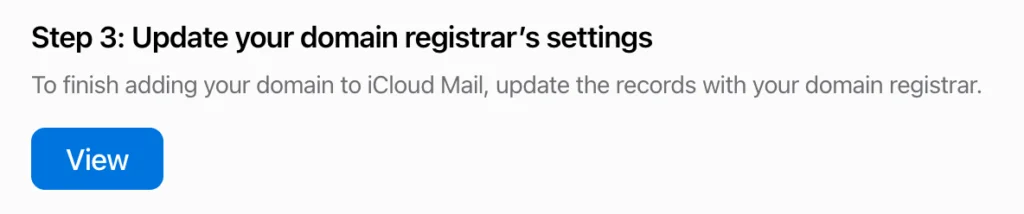
4: Changing your domain’s DNS Settings
In the next step (3), iCloud will present you with some DNS records to add to your domain name. Click the View button to see the exact settings you’ll need to apply:
You should now see a bunch of DNS records to apply to your domain name. In my case I was asked to add:
- 2 MX records.
- 1 TXT record.
- 1 SPF record.
- 1 DKM record.
To manage the DNS settings of your domain, log in to the control panel of your domain name vendor. In my case this is SiteGround. You’ll find your DNS settings under Site Tools > Domain > DNS Zone Editor.
First of all, remove any existing MX records. Make sure not to touch the other DNS records as this may cause your website (if you have one) to stop working. Then, add the DNS records as indicated by iCloud:

Make sure to add all the records, and make sure that you select the correct type on the top of the screen.
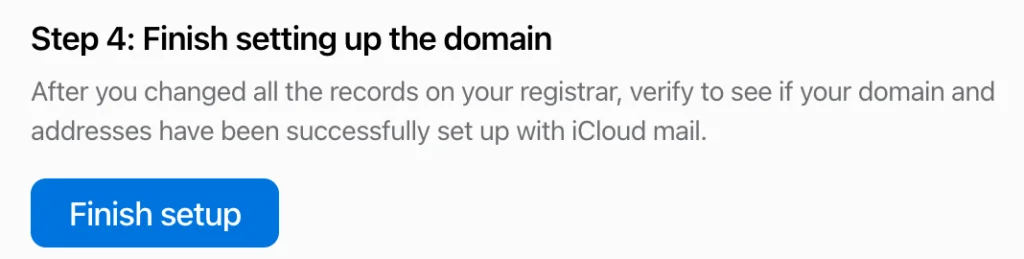
5: Finalize the setup
Once you’ve added all the DNS settings required, go back to iCloud and click on Finish setup:
If you perform this step immediately after the previous step, you may see the warning below, indicating that one of your DNS records has not yet been updated.

No need to worry. This has to do with the simple fact that DNS records can take up to max. 72 hours to be updated. In practice however, often they update much faster. If you see this message, the best you can do is wait a few hours before trying again. In the meantime, you can close iCloud.com.
If it still doesn’t work after waiting, you should probably double check whether or not your DNS settings are really correct and 100% matching iCloud’s table. Once the DNS has been resolved, you should see the message below:

Managing email addresses
Now that your domain name is correctly pointing to iCloud, you can start managing the email addresses that you want to use with your own custom domain name. This can be info@yourdomain.com, or in my case mail@wouterpostma.com.
Adding an email address
To set this up, go back to the Custom Email Domain settings in iCloud. Then click your domain name and find the Add an email address settings to add a new address to your iCloud account.

After adding it here, navigate to your iCloud Mail (icloud.com/mail) or open the Mail app in your Apple device, and you should see your new email address already. You can select this address as a sender when composing a new email.

Default sender
Would you like to use your new, custom email address as the default sender for iCloud Mail? You can set this up via iCloud Mail’s settings menu, under the Composing tab:

You can of course also change this setting on any other Apple device using the same Apple ID (like an iPhone, iPad or Mac). Thanks to Apple’s iCloud synchronisation, the email address will be available on all your devices automatically.
Finally
Using your own domain name for iCloud Mail is relatively simple. You do need a (paid) subscription to iCloud+ to be able to use a custom domain, but this subscription is not expensive.
The main advantage of using iCloud is that everything will automatically be synchronised across all your (Apple) devices. In addition, iCloud Mail has better SPAM filters than most web hosting providers default email software (that comes free with your domain and/or website).
Leave a Reply